
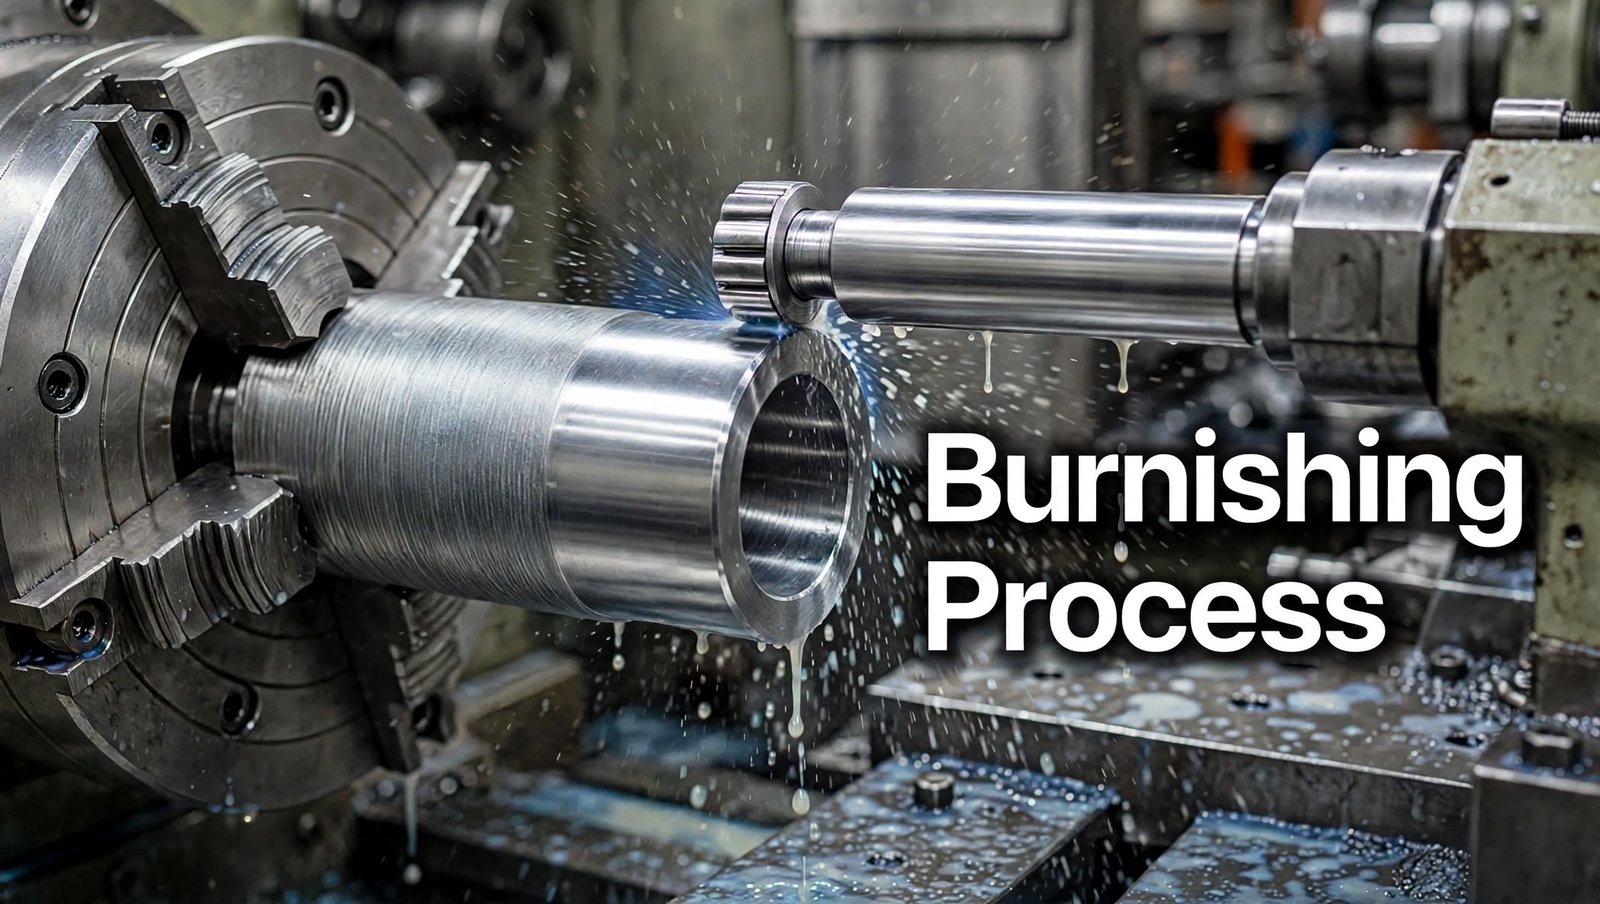
Hello readers, welcome to the ELearnInsight.com. Let’s begin with the title of this blog. The title of this blog might sound crazy. But when you look for the burnishing process and get to know about it, you may agree with the title. The burnishing process improves surface finish, size control, and part life without removing any material. Many engineers overlook it. Yet it can replace grinding, honing, and polishing on a wide range of parts. Better still, it runs on the same machine as turning or boring. As a result, you save time, tooling, and handling.
This guide explains burnishing in plain language. First, you will learn the burnishing meaning and definition. Next, you will see how the process works and which tools and machines to use. Finally, you will get a step-by-step surface treatment selection guide and a troubleshooting table. Students, engineers, and shop-floor professionals can use it as a quick, practical reference.
Quick answer: Burnishing is a cold-working finishing process. A hardened roller, ball, or diamond presses the surface beyond its yield point. The peaks flow into the valleys. The result is a smoother, harder, and more accurate surface.
What Is Burnishing? Definition and Meaning
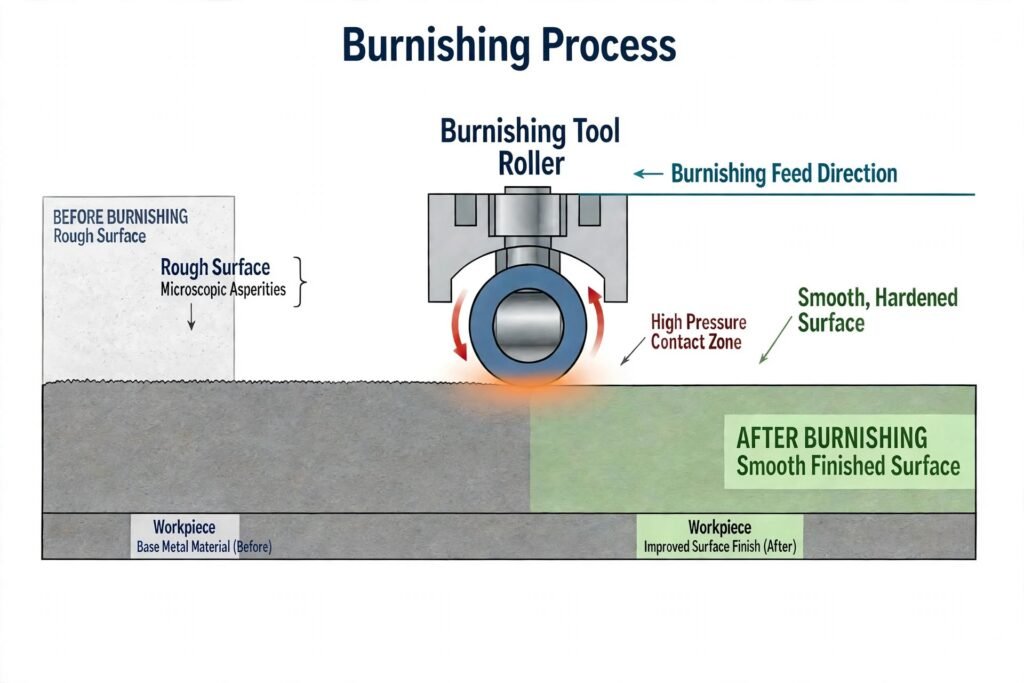
Burnishing is a chipless finishing process. A hard, smooth tool presses against a metal surface and moves across it. The pressure exceeds the material’s yield strength. Therefore, the surface layer deforms plastically, and the microscopic peaks flow into the valleys.
Here is a simple definition of burnishing: it is the cold working of a metal surface with a hardened tool to improve finish, size accuracy, and hardness. If you search for “burnish meaning” or “define burnish,” this is the manufacturing answer. To burnish a part means to smooth it by pressure, not by cutting.
The process has a long history. Industry sources report that roller burnishing entered American industry in the 1930s to improve the fatigue life of railroad axles and shafts. By the 1960s, the automotive sector used it widely. Today, aerospace, oil and gas, medical, and hydraulics manufacturers rely on it across the USA, Europe, Asia, and the Middle East. Unlike grinding or polishing, burnishing uses no abrasives. Consequently, it leaves no grit and no sludge.
Burnished Meaning in Other Fields: Burnished Gold, Burnished Bronze, and Burnisher
The word “burnish” appears in many industries. So, a quick clarification helps avoid confusion.
- Burnished gold and burnished bronze: These terms describe a decorative finish with a warm, rubbed, softly glossy look. Designers use them for hardware and jewelry.
- Burnisher (hand tool): Gilders, leather workers, bookbinders, and dentists use hand burnishers to smooth surfaces. Some leather shops also use an electric burnisher for edges.
- Pioneer burnisher and electric burnisher (floor care): These names usually refer to high-speed floor machines that polish floors.
- Burnisher (machining): This is the roller, ball, or diamond tool that this guide covers.
From here on, burnishing means metal burnishing in manufacturing.
How the Burnishing Process Works?
If you take a turned or bored component, its surface looks smooth. Under magnification, however, it shows peaks and valleys. A burnishing tool applies controlled force to those peaks. The material then flows sideways into the valleys. At the same time, the surface layer compresses and hardens.
Three things happen at once:
- Smoothing: Peak-to-valley height drops sharply.
- Sizing: The diameter becomes more consistent from part to part.
- Strain hardening: The compressed layer gains hardness and residual compressive stress.
In this process residual compressive stress plays an important role. It slows down the crack formation, resulting in the burnished parts often last longer under cyclic loads. Always keep one point in mind, though. The tool displaces material instead of cutting it. Therefore, the part size changes by roughly 5–10 microns (0.0002–0.0004 in) on a typical machined surface. Hence, do plan for this change in the pre-machining step.
Key Benefits of the Burnishing Process
| Benefit | What to expect |
| Surface finish | Often 0.1–0.4 µm Ra (about 4–16 µin), with finer results possible. Roughness typically improves by 50–90%. |
| Size control | Tighter, repeatable sizes. Tool makers quote tolerances within 0.0005 in (about 12 µm) or better. |
| Hardness | Surface hardness rises by about 5–10%. |
| Fatigue life | Tool makers report up to 300% longer life in some applications. Results vary with material and load. |
| Cycle time | Burnishing takes seconds, not minutes. |
Speed and cost also matter. Burnishing runs on the same machine as turning or boring. In contrast, honing, lapping, grinding, and polishing need separate machines, equipment, and skilled operators. Hand polishing on a running machine is also unsafe. Fewer secondary operations therefore mean a better return on investment.
Tool wear is another factor. A cutting insert loses its finish quality as it wears, so operators keep adjusting. A burnishing tool, on the other hand, delivers consistent finish and size over a long run.
Where Manufacturers Use Burnishing
Burnishing suits any part that needs a very smooth finish plus tight size control. Typical examples include hydraulic cylinders, valve bodies, bearing bores, seal diameters, pistons, pins, and shafts. As a rule of thumb, if the drawing calls for 0.4 µm Ra or better, a burnishing tool probably exists for it.
Industries worldwide apply the process. For example, automotive and aerospace plants use it on precision parts. Oil and gas operations in the Middle East use it on valve and cylinder components. Meanwhile, manufacturing hubs in Asia use it to cut secondary operations and lower costs.
Types of Burnishing Tools
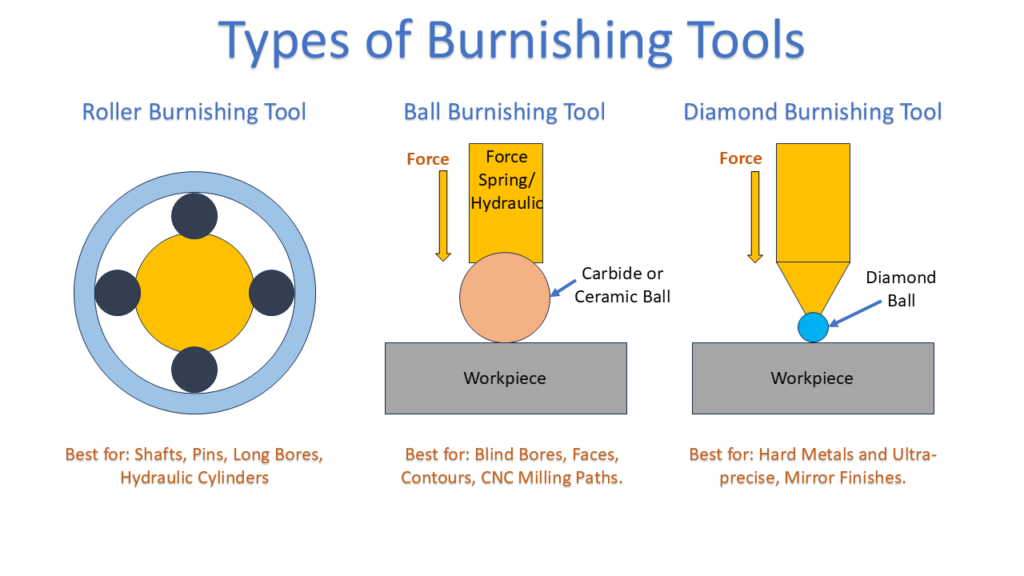
Roller burnishing tools
Roller tools use one or more hardened rollers. They create continuous line contact, so they work fast and give a high-quality finish. A multi-roller ID tool has a cage, cone, rollers, and shank. The cone sets the roller diameter. Single-roller tools, in contrast, adapt to tapers, radii, and large bores.
Ball burnishing tools
Ball tools press a hardened carbide or ceramic ball against the surface. The ball sits in a spring-loaded or hydraulic holder. Contact happens at a point, which makes these tools versatile. As a result, they handle blind bores, flat faces, contours, and multi-axis CNC milling paths.
Diamond burnishing tools
Diamond tools use a polished, fixed diamond tip, often a replaceable insert. The tip slides over the surface instead of rolling. Therefore, you need plenty of lubricant. Diamond tools suit very hard metals and ultra-precise parts, and they give the lowest roughness.
OD burnishing tool
An OD burnishing tool rolls across the outside surface of a shaft, pin, or face. It mounts in a lathe turret or tool holder. Usually, it is the final step of a CNC turning cycle, with no extra machine or setup.
ID burnishing tools
ID tools finish bores in hydraulic cylinders, valve bodies, and bearing housings. Multi-roller designs size through-bore quickly and keep excellent concentricity. Compact ID systems suit small precision bores. Larger multi-roller systems suit hydraulic cylinders and production work.
| Tool type | Mechanism | Best for | Key trait |
| Roller | One or more hardened cylindrical or tapered rollers | Shafts, pins, long bores, hydraulic cylinders | Fast, high-quality finish from line contact |
| Ball | Hardened carbide or ceramic ball | Internal bores, faces, complex shapes, CNC paths | Point contact, versatile for multi-axis work |
| Diamond | Polished fixed diamond tip | Very hard metals, ultra-precise parts | Extreme precision, lowest roughness |
Refer to the below table for the burnishing tool types on the basis of their application and suitability of materials.
| Tool | Primary materials | Starting Ra | Final Ra | Main benefit |
| Multi-roller | Ductile steels, aluminium, copper, brass | 0.8–3.2 µm | 0.05–0.2 µm | Very fast ID sizing |
| Single-roller | Mild steel, stainless, aluminium, titanium | 1.0–3.0 µm | 0.1–0.4 µm | Adapts to tapers and radii |
| Carbide or ceramic ball | Hardened steels, general alloys | 0.8–2.0 µm | 0.1–0.3 µm | Fits multi-axis CNC paths |
| Diamond tip | Tool steel, titanium, Inconel, cast iron | 0.5–1.5 µm | Below 0.1 µm | Highest-clarity mirror finish |
Burnishing tool providers:
Where can we get the tools? There are toolmakers and suppliers available that provide the various burnishing tools as per your requirements with usage guidelines. Cogsdill, Bright Burnishing Tools, etc., are the manufacturers and the suppliers of the burnishing tools.
Machines Used for Burnishing
Does it need a special machine to perform a burnishing operation?. Of course, no! Burnishing needs a rotating spindle or a controlled tool path. Consequently, many machines can do it.
- CNC lathes and turning centers: Add an OD or ID tool as the last pass.
- Manual lathes: Use a spring-loaded or fixed-diameter tool for small batches.
- Machining centers and CNC mills: Run ball tools along flat faces and 3D contours.
- Drill presses and boring machines: Any rotating spindle can drive an ID roller tool.
- Multi-spindle and Swiss-type lathes: These machines add burnishing to high-volume small parts.
- Cylinder tube machines: Dedicated skiving and roller burnishing machines finish long hydraulic tubes.
More importantly, the rigidity matters on every machine. Vibration passes straight to the surface, so keep the setup stable and the tool aligned.
Burnishing Aluminium and Other Materials
The burnishing works best on ductile materials. Burnishing aluminum gives excellent results because the metal flows easily. Valve bodies, pistons, and sealing bores benefit most. However, soft aluminium marks easily. Use clean tools, moderate pressure, and good lubrication to avoid material pickup.
| Material | Suitability | Suggested tool |
| Low-carbon and alloy steels | Excellent | Roller or ball |
| Stainless steel | Good; work hardens, so use a rigid setup. | Roller or ball |
| Aluminium alloys | Excellent | Roller |
| Brass, copper, bronze | Excellent | Roller |
| Titanium | Good | Single-roller or diamond |
| Tool steel, Inconel, cast iron | Possible with care | Diamond |
| Brittle or very hard materials | Poor; may flake | Test first or avoid. |
Roller tools generally handle materials up to roughly 45 HRC. Harder materials usually need diamond or ceramic ball tools. Always confirm limits with your tool supplier.
How to Prepare the Part Before Burnishing
Burnishing is a finishing process. It cannot fix a bad surface. Therefore, preparation decides success.
- Consistent pre-finish: The turned or bored surface must be consistent, not necessarily smooth.
- Target roughness: Many tool makers recommend 32–64 µin (0.8–1.6 µm) Ra. Multi-roller tools often accept up to 80–125 µin (2–3 µm) Ra. Check your tool’s data sheet.
- Too rough: Excess pressure and possible flaking.
- Too smooth: Little material to displace, so little improvement.
- Stable geometry: The burnisher follows the existing surface, so an out-of-round part stays out of round.
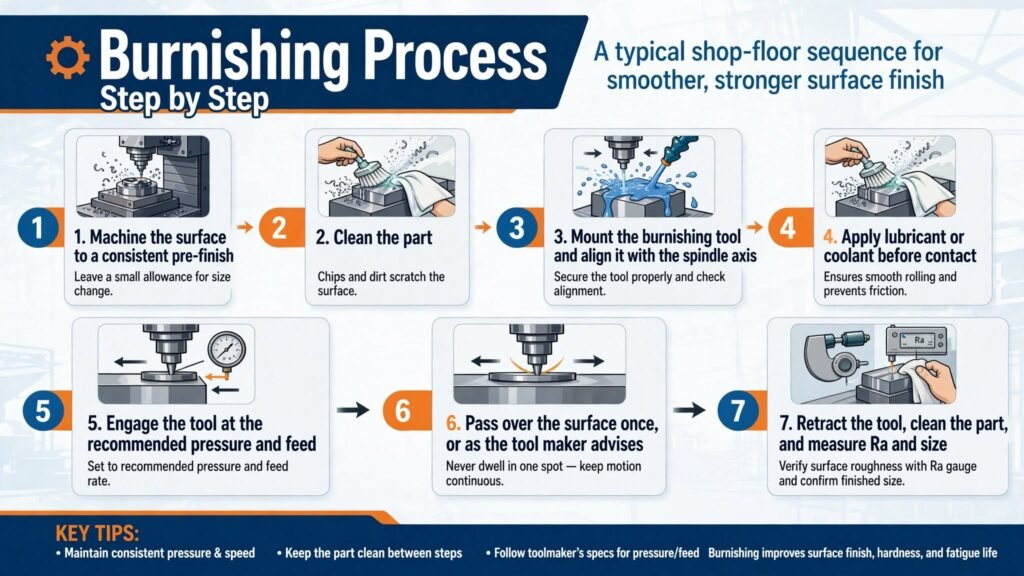
Burnishing Process Step by Step
A typical shop-floor sequence looks like this:
- Machine the surface to a consistent pre-finish. Leave a small allowance for size change.
- Clean the part. Chips and dirt scratch the surface.
- Mount the burnishing tool and align it with the spindle axis.
- Apply lubricant or coolant before contact.
- Engage the tool at the recommended pressure and feed.
- Pass over the surface once, or as the tool maker advises. Never dwell in one spot.
- Retract the tool, clean the part, and measure Ra and size.
Speeds, Feeds, Pressure and Lubrication
Start with the tool maker’s recommended settings. Then test on a sample part. Measure Ra and size. Finally, adjust one variable at a time.
- Speed: Speeds are often higher than in cutting because no chips form.
- Pressure: Too much distorts the part or over-displaces material. Too little does not improve the finish. Research shows an optimal force exists, and more pressure beyond it can reverse the gain.
- Feed: Slower feeds improve finish through better overlap. However, they raise cycle time.
- Lubrication: It cuts friction and keeps the finish consistent. It is critical.
Burnishing vs Grinding, Honing, Lapping, Polishing and Shot Peening
| Process | Typical Ra | Separate machine? | Main strength |
| Burnishing | 0.05–0.4 µm | No | Finish, size, and hardness in seconds |
| Grinding | 0.1–1.6 µm | Yes | Stock removal and geometry correction |
| Honing | 0.1–0.8 µm | Yes | Bore geometry and cross-hatch pattern |
| Lapping | 0.02–0.4 µm | Yes | Extreme flatness and finish |
| Polishing | 0.05–0.4 µm | Often | Cosmetic finish |
| Shot peening | Roughness usually rises | Yes | Fatigue life, not finish |
Notice the pattern. Grinding and honing remove material. Burnishing does not. Therefore, burnishing cannot correct geometry errors, but it can finish and size a good surface faster. Shot peening, by contrast, improves fatigue resistance but does not smooth the part.
Surface Treatment Selection Guide: How to Choose the Right Process
Use this guide for real-time decisions on the shop floor. Follow the steps in order.
- Check the drawing. Do you need 0.4 µm Ra or better, or tight size control? If not, standard turning or grinding is enough.
- Check the material. Is it ductile and about 45 HRC or less? If so, roller burnishing works. If it is harder, consider diamond or ball tools.
- Check the pre-finish. Is the surface consistent and within the tool’s range? If not, re-machine first.
- Pick OD or ID. Use single-roller or carbide-roll tools for outside diameters. Use multi-roller tools for through-bores.
- Pick the geometry tool. Use ball tools for faces, blind bores, and contours.
- Run a trial. Test pressure and feed, then measure Ra and size before production.
| Your requirement | Best process |
| 0.4 µm Ra or better on a ductile shaft OD | OD roller burnishing |
| Hydraulic cylinder bore with tight size tolerance | Multi-roller ID burnishing |
| Flat face, blind bore, or 3D contour | Ball burnishing on CNC |
| Hard metal or mirror finish | Diamond burnishing |
| Out-of-round part or large stock removal | Grinding or honing first |
| Corrosion or deep wear resistance | Coating or heat treatment |
Burnishing is not always the right choice. Avoid it for brittle materials, parts that need stock removal, and surfaces that need roundness correction. Additionally, it does not add corrosion protection or deep case hardness.
Troubleshooting Burnishing Problems
| Problem | What to check |
| Finish not improving | Incoming surface (likely too smooth), then pressure and feed |
| Size changes too much | Pressure too high. Burnishing displaces material, so plan for it in pre-machining |
| Chatter or inconsistent finish | Rigidity and tool alignment, since vibration transfers directly to the surface |
| Unexpected tool wear | Lubrication, material hardness, and whether the tool suits the material |
| Flaking or peeling surface | Pre-finish too rough, pressure too high, or material too hard |
Common Burnishing Mistakes to Avoid
- Skipping preparation: A surface that is too smooth or inconsistent gives poor results.
- Over-burnishing: Too much pressure or too many passes can flake the surface.
- Ignoring size change: Always include the displacement in your pre-machining allowance.
- Running dry: Without lubricant, friction rises and tool life drops.
- Wrong tool choice: Roller tools struggle on hardened parts that need diamond.
Quality Checks After Burnishing
Measure Ra with a profilometer. Check size with an air gauge or bore gauge. Inspect under magnification for flaking. Moreover, record pressure, feed, and speed for each batch, so you can repeat the result.
Conclusion
The burnishing process delivers a smoother, harder, and more accurate surface in seconds. Success depends on five things: good pre-machining, proper tool selection, correct pressure, a stable setup, and consistent parameters. In addition, better finish in less time means more money saved in production. If you fight for 0.4 µm Ra or better, or struggle with size control, burnishing is worth trying. Use the selection guide above, test on a sample, and then scale up. Bookmark this guide for your next surface treatment decision. Moreover, share it with your team, so everyone follows the same process. If you have a question about a specific part, material, or drawing callout, leave a comment below. We read every one
Frequently Asked Questions
What is burnishing in simple words?
Burnishing smooths a metal surface by pressing it with a hard tool. It moves material instead of cutting it.
Does burnishing remove material?
No. It pushes material from peaks into valleys. Part size changes by only a few microns.
What surface finish can burnishing achieve?
Often 0.1–0.4 µm Ra, and finer with diamond tools. Results depend on material, pre-finish, and tooling.
Can you burnish aluminium?
Yes. Aluminium is ductile and burnishes well. Use moderate pressure and good lubricant.
What is the difference between burnishing and polishing?
Polishing uses abrasives and removes a small amount of material. Burnishing uses a hard tool and removes none. It also hardens the surface.
What is an OD burnishing tool?
It is a roller or carbide-roll tool that finishes outside diameters, usually as the last pass on a CNC lathe.
To know about more srface treatment processes in the enginerring kindly refer to our blog : Surface Treatments in Engineering.
Discaimer: Some content or Image are generated from AI for information purpose and better understanding.